
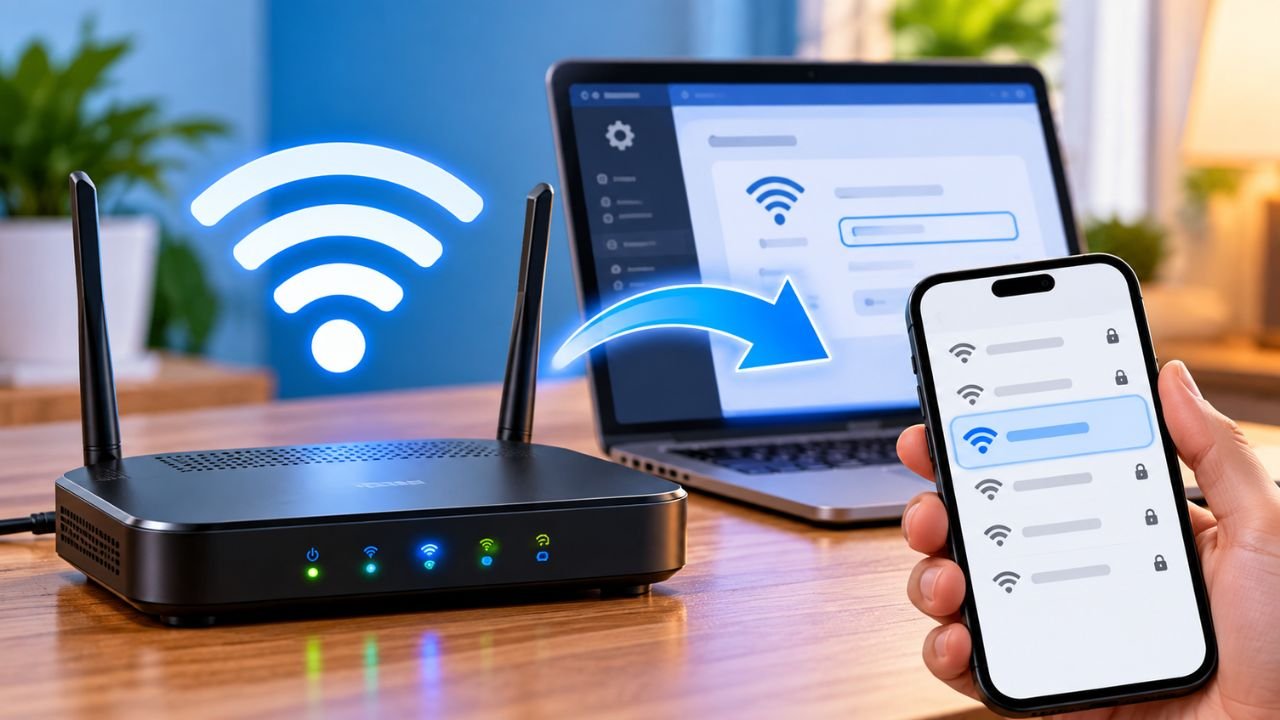
Generally, changing your WiFi name is an easy process as you do not need to either contact your Internet Service Provider or get a new router. In most instances, you would be able to update the name right from the settings page of the router, using the mobile phone, tablet, or computer.
Your WiFi name is known as the SSID. This is the name that appears when you check the WiFi list on your device. For instance, you may have the name of your router be something like “HomeWiFi” or “TP-Link_1234.” Therefore, you are able to change the name to one that you find more recognizable.
Although the procedures may slightly differ from one brand of router to another, the overall process remains the same. You will have to connect to the router, go to settings, search for the wireless settings, change the name, and save the settings.
What You Need Before Changing the WiFi Name
Before getting started, there are some things that you should have ready to make the process easier for you.
- a phone, tablet, or computer that is connected to your WiFi
- your router’s login details
- how to access the router’s settings
- Your new WiFi name
If you do not know your router’s login details, look on the router label first. Many routers will also provide their default login information within their user documentation.
Another thing to keep in mind is that changing your WiFi name will probably cause your devices to disconnect from that WiFi network. This is normal and you will have to reconnect to the WiFi under your new name after the changes have been made.
How to Change Your WiFi Name
This is the method you can use on most home routers. The names of the menus may differ from one router to another, but the steps are mostly the same.
Step 1: Connect to Your Router
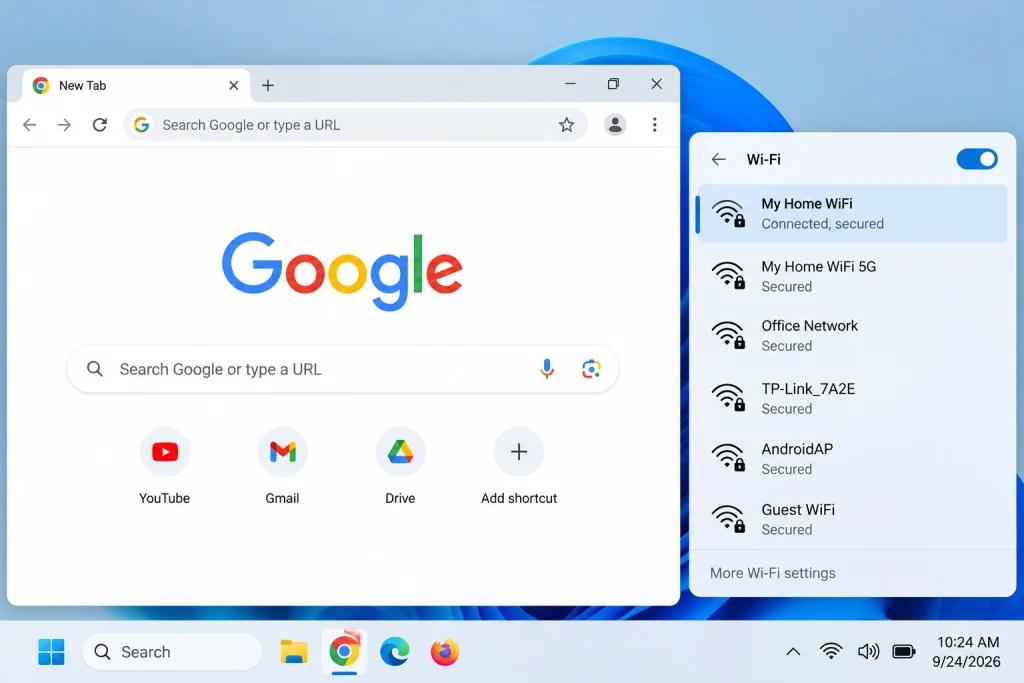
To begin, connect your computer or phone to your home Wi-Fi network. This can be done via an Ethernet cable; however, the wired connection might be useful if you want to avoid losing your connection during the process.
Now that you are connected, launch any web browser such as Chrome, Edge, Firefox, or Safari.
Step 2. Find Your Router’s IP Address
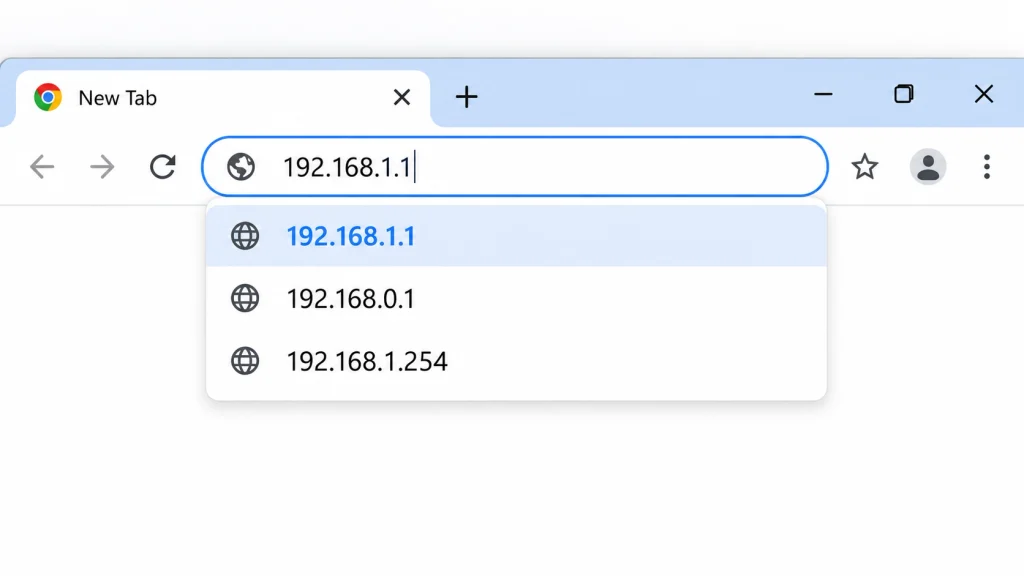
Next, you need to open the router’s settings page.
If you want to check your public IP address separately, you can use My IP Address. However, the address you need for your router settings is usually a local IP address.
Common router addresses include:
192.168.1.1
192.168.0.1
192.168.1.254
You will enter any of the above-mentioned address in the URL field of the browser. Do not put it on the Google search bar.
If the above address does not work check your router for its label or consult your user manual for the alternative address in case your ISP is using other address.
Some of the modern routers now have mobile applications and hence there will be no use of any of the above-mentioned URLs.
Step 3. Log In to the Router
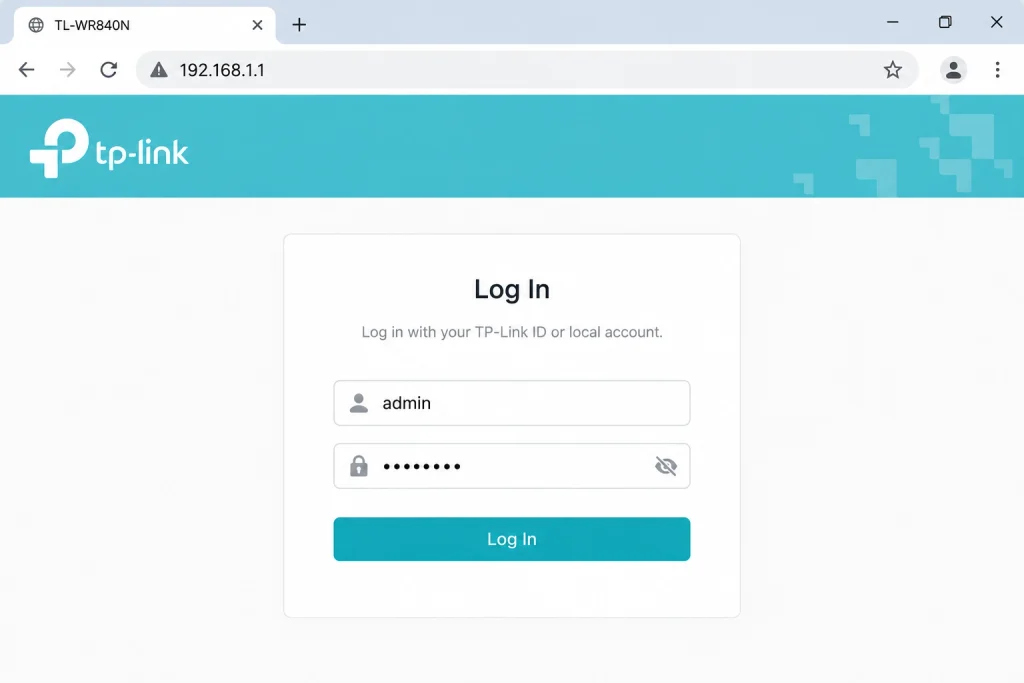
When you type in the correct address, you will be taken to the router login page.
You will need to input your username and password. These will not necessarily be the same as your WiFi password.
If you changed the password for your router administrator, then you will need to use your new password. Otherwise, if you haven’t assigned a new password, you can usually find the default login on the label on the router.
Don’t guess too many times, however, if you are not sure of the password, consult your router’s user manual or contact your service provider.
Step 4. Open the Wireless Settings
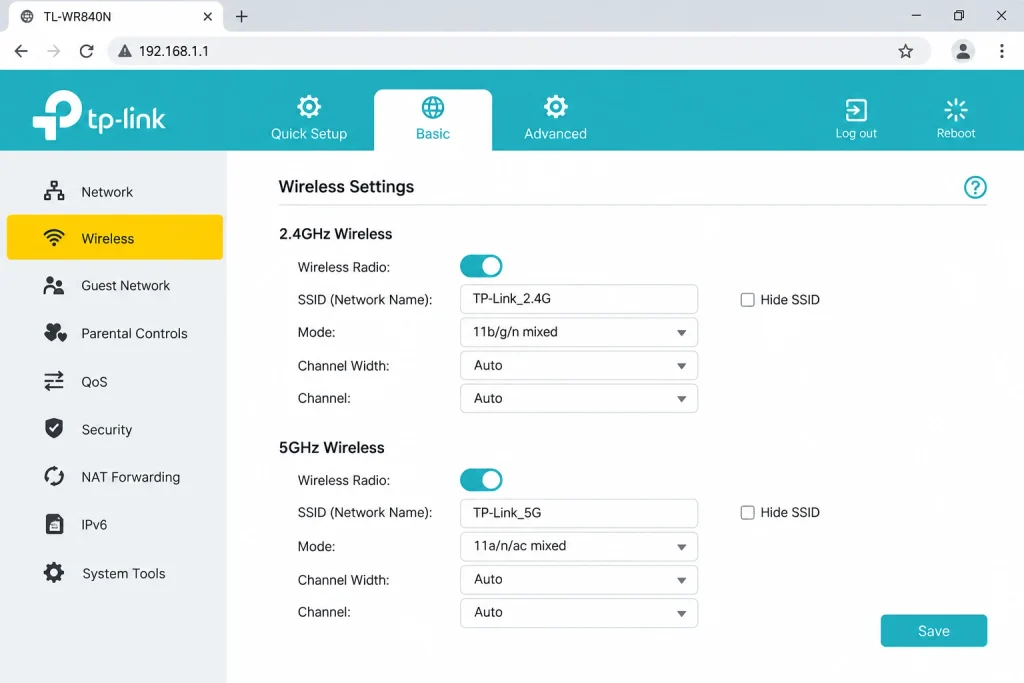
Once logged into the router, explore the menu options provided.
The menu settings should display some of the following options, depending on router models:
- Wireless
- WiFi Settings
- WLAN
- Network
- Wireless Network
- SSID Settings
Search for the appropriate menu for WiFi or wireless networking.
Note the field labeled SSID, Network Name, or WiFi name.
Step 5. Enter Your New WiFi Name
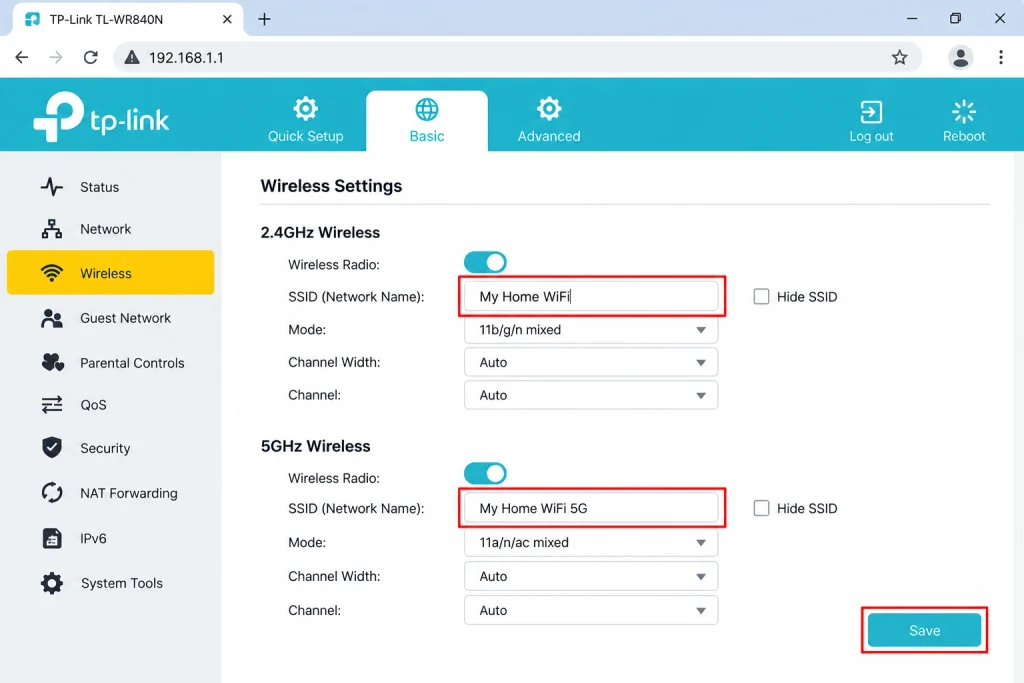
Replace the old name with your desired name.
Choose a name that is easy for you and your family to recognize, such as “Smith Home WiFi” or “Living Room WiFi.”
Stay away from using personal information in the name. Using your address, phone number, or anything else that is personal is not very wise.
You can choose a unique name if there are multiple similar names in your area so that you can recognize the network.
Step 6. Save the New Name
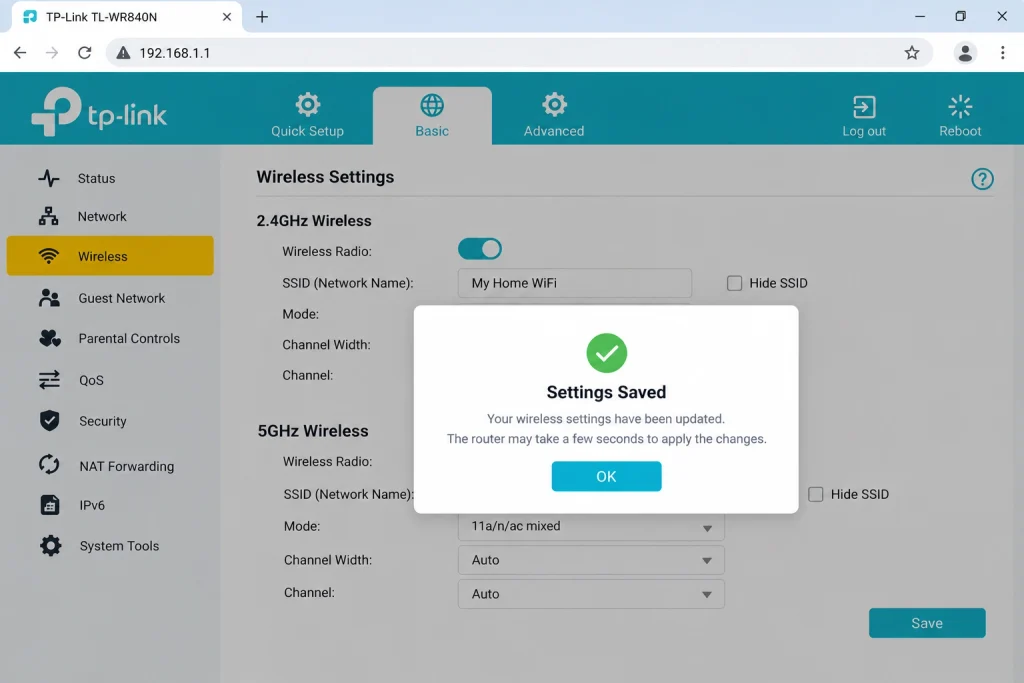
Once you’ve changed your WiFi name, look for something that says Save, Apply, or Update. Clicking it will confirm the change. It may take some time for your router to apply the change; it could even reboot its wireless connection to do so.
Because of this, never unplug your router when it is applying the change unless instructed to do so in the user guide.
Step 7. Connect Your Devices Again
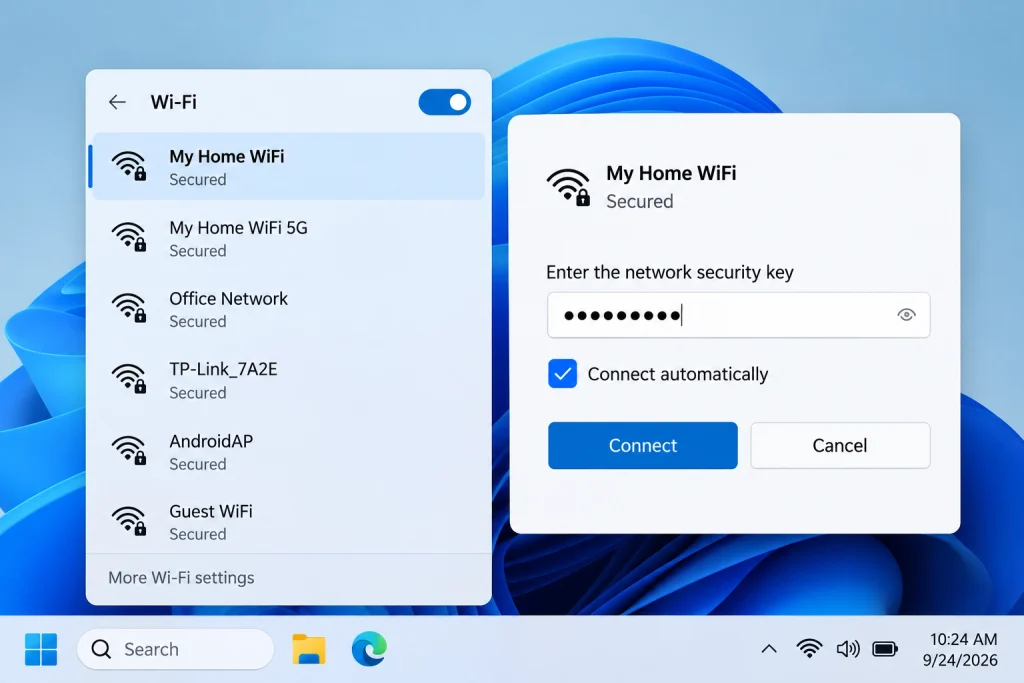
Once the changes have been implemented, access the WiFi settings on your smartphone, computer, smart television, and similar devices.
Your new WiFi name shows on your device.
Choose it and type in your WiFi password.
If your password has not changed, you can continue using your old password. The only thing that has been updated is your WiFi name.
In some cases, your devices will automatically reconnect. In other cases, you have to select the new WiFi name manually.
How to Change the WiFi Name From a Router App
Many newer routers have the option of using a mobile app for managing the router, rather than the web browser. This can be an easier method of management.
Install the official app for your router’s brand. Next, sign in and select your router.
Look for a settings menu labeled WiFi, Wireless, or Network settings.
After that, you will need to locate the field for the WiFi name or SSID and enter a new name for it.
Once this has been accomplished, the WiFi connection from the router may restart for a brief moment. When it reconnects, you will need to reconnect all of your devices.
Each router will have a different set of menus, so if you cannot find the proper setting, please consult the help section of the app or the instructions for the router from the model.
Can You Change the WiFi Name Without Changing the Password?
Yes. Some routers allow you to change your WiFi name without changing your password.
The SSID and password are separate settings, which is why you can usually change your name without having to provide a different password.
However, you may want to change both names if you are updating your security settings. If you do change your password, make sure that all of your devices are updated with the new password.
What Makes a Good WiFi Name?
Your Wi-Fi name can be anything that you want it to be within the rules of your router’s configuration. However, there are some basic guidelines that can help you to choose the best Wi-Fi name:
- Make it short and easy to remember.
- Use an appropriate name that does not include personally identifiable information.
- Do not include your address as part of your Wi-Fi name.
- Make it easy to distinguish from other names within the vicinity of your Wi-Fi signal.
- Have a name that is acceptable to all.
For instance, if you name your Wi-Fi connection “Family Wi-Fi,” it is extremely simple and easy to remember. Alternatively, if you call it “Home Network 5G,” it guarantees that you can instantly tell your home network apart from others.
Keep in mind that whoever is within range of your Wi-Fi network will be able to see the name you have chosen. Therefore, make sure not to include sensitive or confidential information in your Wi-Fi name.
What to Do If the New WiFi Name Does Not Appear
In some instances, the new name for the WiFi may not show up right away.
To start, please give it a couple of minutes for the router to make the necessary updates.
Next, please disable and then enable your WiFi connection on your computer or phone and then check the list of available wireless networks.
If this did not resolve the issue, please restart the router and allow it time to power up and check the available connections again.
Ensure that you selected the right configuration as most modern routers feature different frequencies, that being 2.4 GHz and 5 GHz. In some cases, some routers do have the features to enable both bands to function under the same name.
What Happens to Your Connected Devices?
Changing the name of a Wi-Fi will cause the devices that are connected to that Wi-Fi to stop working temporarily as the devices will be looking for the previous Wi-Fi name before making a connection.
Once you change the name of your Wi-Fi, your devices may not be able to recognize it and this is why you will have to reconnect your devices like:
- Smartphones
- Laptops
- Smart TVs
- Gaming consoles
- Printers
- Security cameras
- Smart home devices.
The steps to do this is pretty much simple like choosing the new name of Wi-Fi and putting the already existing password.
However, in order to connect the smart home devices to Wi-Fi, you might require additional steps since at times the device might not connect automatically. In that case, you can use the app linked with that device and follow the connection steps provided in there.
Does Changing the WiFi Name Improve Internet Speed?
Modifying the WiFi SSID will not generally result in better speed on your internet connection.
The SSID only denotes the name you use to identify your wireless network. The speed of your internet connection can depend on other factors such as your internet connection plan, performance of your router, strength of your signal, the number of users on your network, and your internet connection type.
However, changing your WiFi name can help you differentiate between your network and other nearby networks that may use a similar default name.
Final Thoughts
Changing your WiFi name is easy. Just log into your router settings, go to the section for SSID or Wi-Fi and type in the new name. After that you can reconnect your devices using the new Wi-Fi name. If there is no mention of how to do this in the settings, consult your router’s user guide.
Choose something simple and suitable that is easy to memorize, and preferably does not indicate personal information.